 PrimePatio
Projects
Laying slabs that are still level in three years
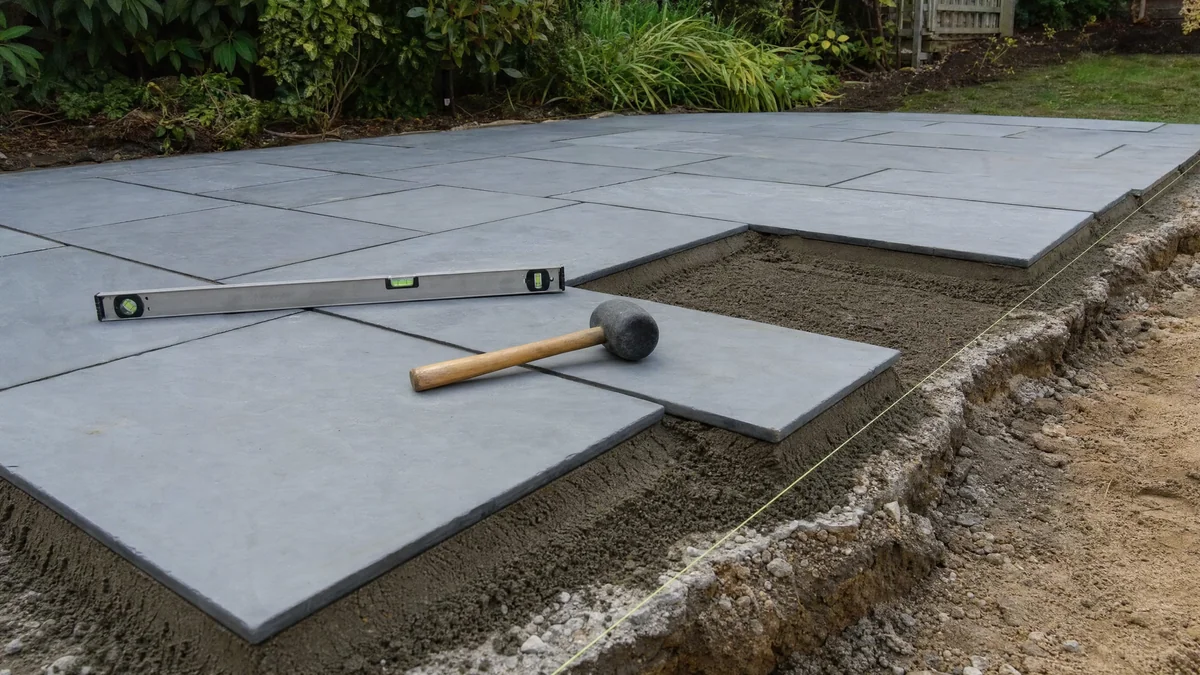
A patio rarely fails all over at once. It fails in patches. One slab rocks under your heel, the next holds a puddle, a third splits across the middle. The slabs are seldom at fault. What sits under them is, and by then the fix is to lift the lot.
The two shortcuts behind most sunken patios
The first is a sub-base that was too shallow, or that went in as one deep lift and never got compacted. Loose stone carries on settling for years under nothing more than footsteps and weather.
The second is bedding each slab on five dabs of mortar, one at each corner and one in the middle. It is quick, and it leaves most of the underside over fresh air. Water finds those voids through the joints, and frost expands it and lifts the corner. Stand on the unsupported centre of a 600mm slab often enough and it cracks across. Neither fault shows in the first summer. Both show by the third.
Dig deeper than feels reasonable
Strip out everything soft: turf, topsoil, roots and any made-up ground a spade sinks into easily. If the spade goes in without effort you have not reached firm ground, so keep going and make the difference up in compacted stone.
For a patio that carries people, a table and a few chairs, work to 200mm below the finished paving level: 100mm of compacted hardcore, a 40mm mortar bed and the slab. For a hot tub, oversized planters or a barrow route, take the dig to 250mm and put the extra into the sub-base.
| Layer or figure | Foot traffic | Hot tub, planters or soft ground | Point to watch |
|---|---|---|---|
| Excavation below finished paving | 200mm | 250mm | Measured from the finished level, not existing ground |
| Compacted hardcore sub-base | 100mm | 150mm | Graded crushed stone, never rubble with plaster in it |
| Layer thickness before compacting | 50mm | 50mm | Two lifts for a patio, three for the heavier build-up |
| Full mortar bed, 4 sharp sand to 1 cement | 40mm | 50mm | Continuous under the whole slab, no dabs |
| Slab thickness | 20mm to 50mm | 30mm to 50mm | Thin porcelain needs its back primed |
| Joint width | 8mm to 10mm | 10mm | The same everywhere, it is what you point into |
| Fall away from the house | 1 in 80 | 1 in 80 | 12mm of drop for every metre |
Compact in layers, not in one go
A plate compactor is a cheap day hire and the one tool worth insisting on. Rake the stone out at roughly 50mm, damp it lightly so the fines bind, then run the plate over it four or five passes until the stone stops moving, and only then put the next layer down. The same 100mm dropped in as one lift looks identical from above and stays loose in the middle: that is the dip beside the back door two winters later.
The fall, and where the water goes
Every patio has to shed water away from the building. Work to 1 in 80, which is 12mm of drop per metre, so roughly 50mm across a 4m terrace. Any less and water sits in shallow pools. Much more and a table feels like it is on a slope.
Set the fall before a single barrow of stone goes in: pins at the wall, pins at the outer edge, a string line dropped by the right amount, and every check taken off that line rather than a spirit level held flat. Then look at where the water arrives. A gravel margin, a border bed or a channel drain along the low edge all deal with it. A boundary fence does not.
Keep the paving clear of the damp proof course
Where the patio meets the house, the finished surface has to sit at least 150mm below the damp proof course, roughly two courses of brick. Paving laid level with that barrier bridges it and lets moisture track into the wall, and the first sign is usually a damp patch on the skirting inside. If the levels genuinely will not allow 150mm, run a channel drain or a recessed gravel strip along the wall and step the paving down away from it.
A full bed, laid the slow way
Mix 4 parts sharp sand to 1 part cement, semi-dry: squeezed in a gloved hand it should hold its shape without weeping water. Lay enough for one slab at a time, about 10mm proud of the finished depth, raked out to cover the whole footprint including the corners. Dense slabs, porcelain especially, will not bond to a semi-dry bed, so brush a cement slurry across the back of each one and place it while that coat is wet.
Lower the slab in rather than sliding it, then tap it down with a rubber mallet, working out from the centre until it sits on the line. Bridge a straight edge back to the slab already laid and check the fall as you go. If one sits low, lift it and add material. Never wedge anything under a corner, and never hit a stubborn corner harder, which is how slabs crack from underneath. Lift the first slab back off after tapping: full mortar contact across the whole face tells you the mix and the bed depth are right.
Joints, and why brushed-in kiln dried sand fails here
Kiln dried sand belongs to block paving. Blocks lock against each other, sit on a permeable laying course, and let water drain away below.
A slab patio on a full mortar bed is the opposite. Nothing drains through it, so water runs across the slabs and gathers at the joints. Loose sand washes out the first time a hose goes near it, blows out in dry weather and gets carried off by ants, and the empty joints fill with grit and weed seed inside a season. The slab edges then take every knock directly and chip.
Two things hold. Mortar pointing, the same 4 to 1 mix slightly wetter, pressed home with a pointing iron and finished just below the slab face. Or a brush-in resin compound made for paving, which goes down faster and is kinder to porcelain. Either way the joints need a consistent width and filling to their full depth, because half filled joints hold water and fail first.
Edge restraint, because the edges move first
Perimeter slabs carry load with nothing pushing back on one side, so they creep and tip first. Haunch them: a wedge of concrete against the outside face of the bed, about 100mm wide, brought to within 25mm of the slab surface and cut back on a slope so soil or gravel covers it. Where the paving meets a lawn, keep the haunch low enough for a mower to pass.
Leave it alone while it cures
Stay off freshly laid slabs for a full 24 hours before pointing, then off again for another 24 hours once pointed. Furniture can go back after three days. A filled hot tub should wait a week.
Do not lay below about 5 degrees, or with frost forecast inside 48 hours. If rain comes, sheet the work over on battens so the plastic never touches the surface, because sheeting laid flat on fresh paving marks it. Wipe mortar smears off with a damp sponge as you go: cement left to dry on sandstone or porcelain is a thankless job to shift.
We stock the tools that go onto a patio while it is being built and after it is down: an angle grinder for cutting slabs and kerbs, a cordless pressure washer for the clean down, and a paint sprayer for the fence behind it. Aggregate, cement and plate compactors come from your local builders merchant. Anything we send out is paid for in cash to the courier at the door, nothing before.
Written by the PrimePatio DIY team. Last updated 10 September 2026.
Back to all projects